
You open the cabinet to grab a sponge or dishwasher tabs, and the smell hits first. It's musty, stale, and wrong. Then you see the underside of the cabinet floor or the back wall. Dark spotting. Swollen particleboard. Maybe a ring around the drain line. Maybe a patch that looks dry on the surface but soft underneath.
That moment rattles people for a reason. Mold under a sink feels hidden, unhealthy, and expensive all at once. It also raises the two questions homeowners ask immediately. Is this dangerous, and can I clean it myself?
Both questions matter, but the order matters more. First, stop guessing. Second, assess the material, not just the stain. A small patch on metal or sealed tile is one thing. Mold rooted in damp wood, particleboard, drywall, or a cabinet base that's starting to crumble is a very different job.
That Unsettling Discovery Beneath Your Sink
Most under-sink mold problems start subtly. A slow drip at the trap. Condensation on a cold supply line. A bottle that leaked and stayed trapped against the cabinet floor. The cabinet stays dark, airflow stays poor, and the damage builds out of sight until someone finally empties the space and notices the odor.
The part that gets overlooked is what the mold is growing on. Homeowners often focus on the color and try to wipe the visible area clean. In practice, the more important question is whether the cabinet material is still sound. If the base is swollen, warped, soft, or breaking apart, surface cleaning won't solve the problem because the material itself has become a reservoir.
A quick visual check can help, but you should also look for broader signs of mold in your home if the odor has been present for a while. Under-sink growth often points to a moisture issue that didn't stay neatly contained.
Practical rule: If the cabinet floor feels soft under light pressure, stop thinking in terms of cleanup and start thinking in terms of removal, drying, and repair.
People tend to delay action because the area is small and hidden. That's a mistake. The under-sink cavity sits next to wall voids, flooring edges, and plumbing penetrations. If moisture has been present long enough, the stain you see may be only part of the problem.
Identifying Mold and Understanding Health Risks
“Black mold” is a phrase people use for almost any dark mold growth. That's understandable, but it can create confusion. Many molds look black, and the exact species isn't something you can reliably determine by sight alone.
One species people worry about most is Stachybotrys, commonly called black mold. It has a reputation that often gets overstated, but that doesn't mean it should be ignored. Mold growth indoors always means moisture is present where it shouldn't be.
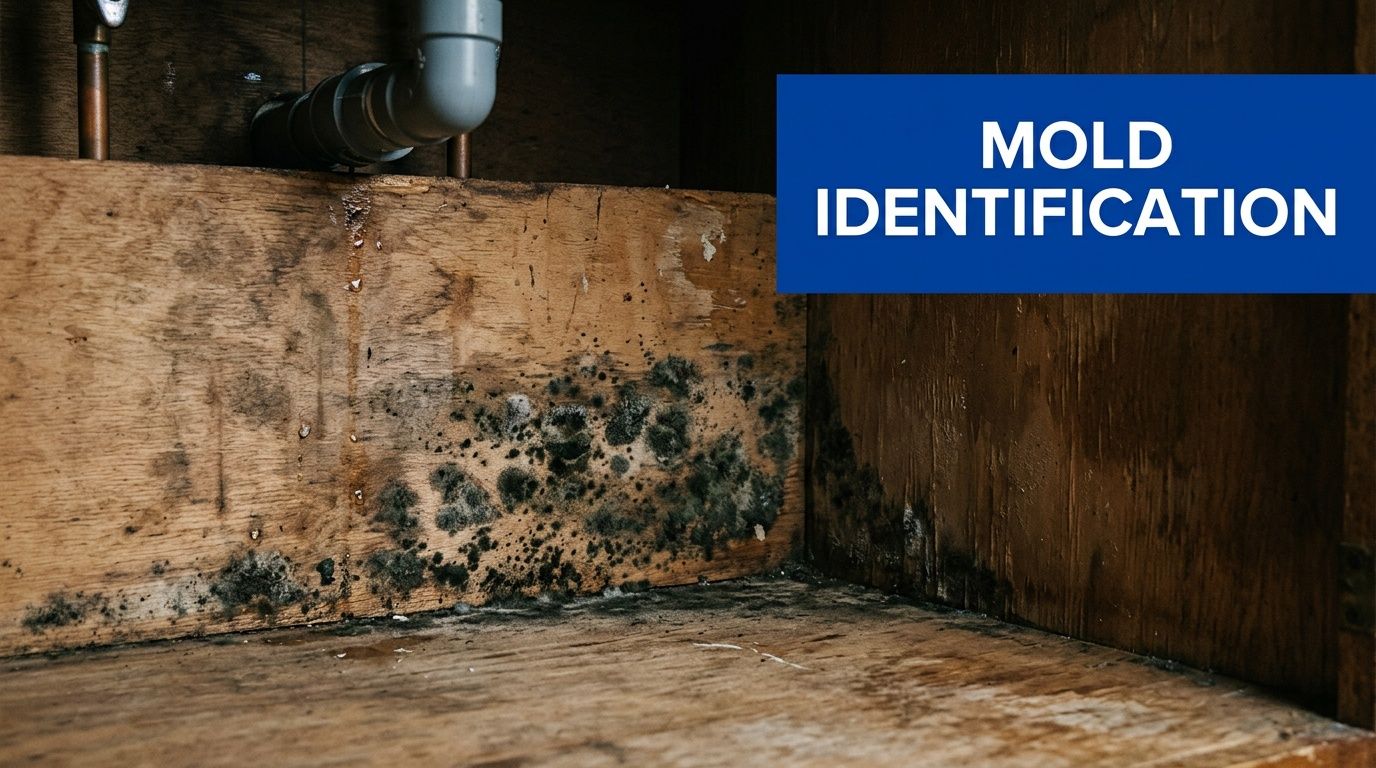
What black mold can do to the body
Stachybotrys, commonly known as black mold, can cause chronic fatigue, persistent coughing, neurological issues like memory loss and confusion, skin irritation, and eye discomfort, making it a significant health hazard when discovered behind kitchen sinks, as noted in this discussion of mold hazards behind kitchen sinks.
That said, not every exposure turns into a medical emergency. The Cleveland Clinic notes that black mold is not more dangerous than other types of mold for most healthy people, though it can worsen asthma symptoms and trigger allergic reactions in people with mold sensitivities. Common symptoms include sneezing, coughing, nasal congestion, postnasal drip, red eyes, wheezing, shortness of breath, and chest tightness, according to this Cleveland Clinic guide to black mold.
Why color matters less than location
When mold is under a sink, the bigger concern is often the environment around it. This area stays damp, enclosed, and lined with materials mold can feed on. If you're trying to sort out what you're seeing, a visual reference to different types of mold in homes can help, but identification alone doesn't fix the issue.
What matters in the field is this:
- Visible growth means moisture has been present
- Musty odor suggests active contamination, even when growth is hidden
- Respiratory symptoms make casual cleanup a poor choice
- Porous materials change the scope of the job
Mold under a sink is rarely just a stain problem. It's a moisture problem with a biological symptom.
That's why experienced remediators don't start with bleach and optimism. They start with source control, material assessment, and a decision about whether the affected surfaces can even be salvaged.
Assessing the Damage DIY Cleanup vs Professional Remediation
The safest decision point isn't “How ugly does it look?” It's “What is it growing on, and where has the moisture gone?”
A lot of online advice treats mold like a housekeeping issue. Under a sink, that approach fails all the time because the cabinet base is often particleboard, thin plywood, or drywall-backed material. Once those materials absorb moisture and start breaking down, cleaning the face of the surface does very little.
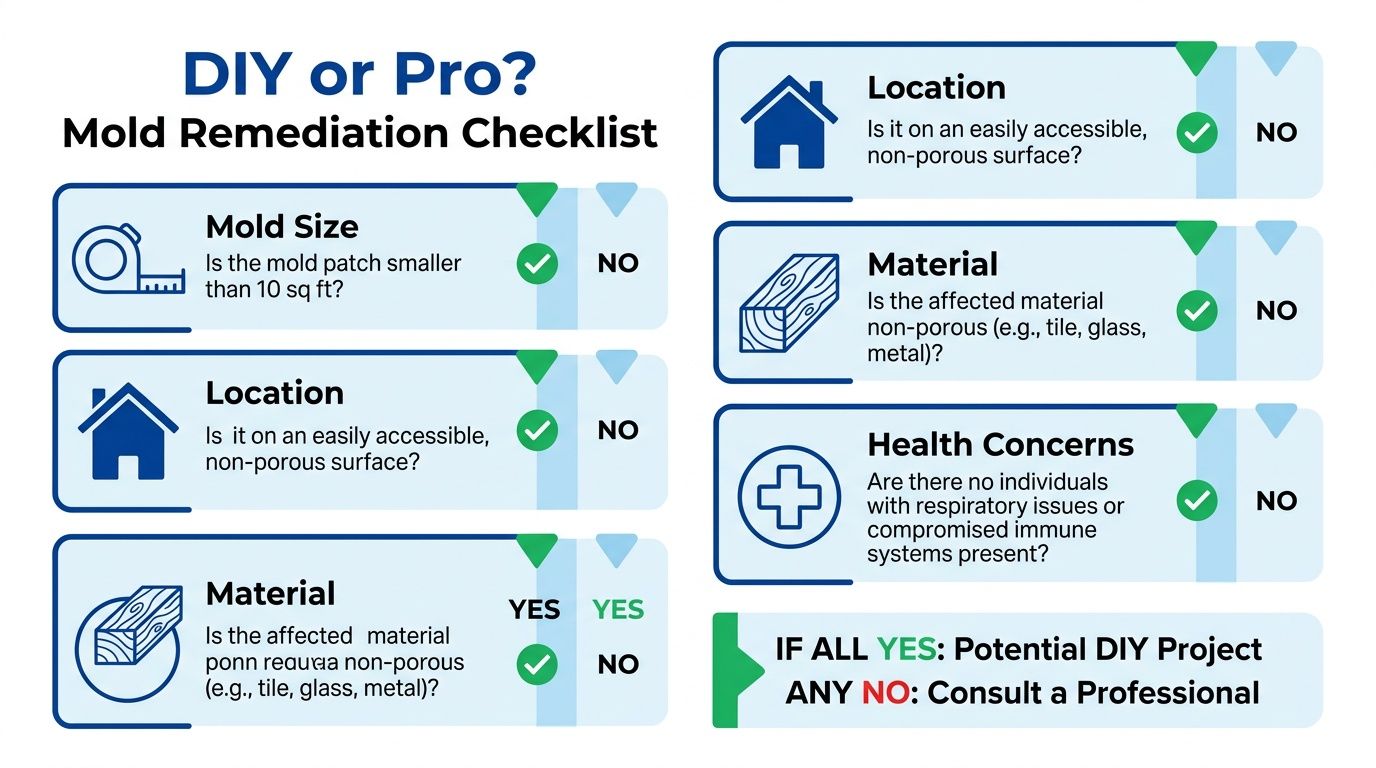
The first screen for DIY
For areas under 10 square feet (about 3 ft x 3 ft), DIY cleanup is EPA-approved using detergent and water scrubbing followed by complete drying, whereas professional intervention is required if the mold exceeds 10 sq ft, extends into walls, or the cabinet base is soft or crumbling, according to this technical remediation discussion on under-sink mold.
That size guideline is useful, but it's not the whole decision.
Here's the framework that matters more in practice:
| Condition | DIY may be reasonable | Professional remediation is the safer choice |
|---|---|---|
| Surface type | Metal, glass, tile, other non-porous surfaces | Wood, particleboard, drywall, cabinet backing |
| Material condition | Solid, dry, structurally sound | Soft, swollen, warped, crumbling |
| Extent | Small, visible, easy to access | Spreading beyond cabinet interior or into wall/floor edges |
| Occupant risk | No one highly sensitive to mold | Asthma, mold sensitivity, immune concerns present |
The structural integrity question most people miss
Many homeowners commonly lose time and money. They scrub the surface, paint over stains, place a tray under the leak, and assume they solved it. If the cabinet base has gone soft, the job has already moved past cleaning.
Porous structural materials hold spores below the surface. If the wood core is compromised, the cabinet floor itself becomes a permanent reservoir. That usually means removal and replacement, not wiping and hoping.
Field judgment: A cabinet floor that flexes, sheds fibers, or has bubbled laminate over swollen board is a repair issue first and a cleaning issue second.
Leaks also need proper correction before anyone talks about remediation. If the plumbing is part of the problem, getting expert plumbing for DFW kitchens can be the most efficient first move before any cleaning or demolition starts.
If you're staring at mold that's moved beyond a simple wipeable spot, a formal mold remediation consultation helps determine whether the wall cavity, toe-kick area, or subfloor edge is involved.
What usually means you should stop and call a pro
- Soft cabinet base: If the particleboard feels spongy or breaks apart, cleanup won't fix the source material.
- Wall involvement: Staining around pipe penetrations or back panels often means hidden moisture.
- Repeated return: If you've cleaned it before and it came back, the moisture source or hidden reservoir is still active.
- Airborne spread risk: Disturbing mold in a tight kitchen can contaminate nearby contents if containment isn't done properly.
The trade-off is simple. DIY can be appropriate for a very limited surface condition. Once the materials themselves are failing, professional remediation protects both indoor air and the repair budget that comes after.
Essential Safety Gear and Containment Protocols
People get into trouble with black mold under sink cleanup when they treat it like routine housework. Scrubbing mold without protection stirs spores and fragments into the air right in front of your face. Under a sink, that happens at close range in a cramped enclosure.
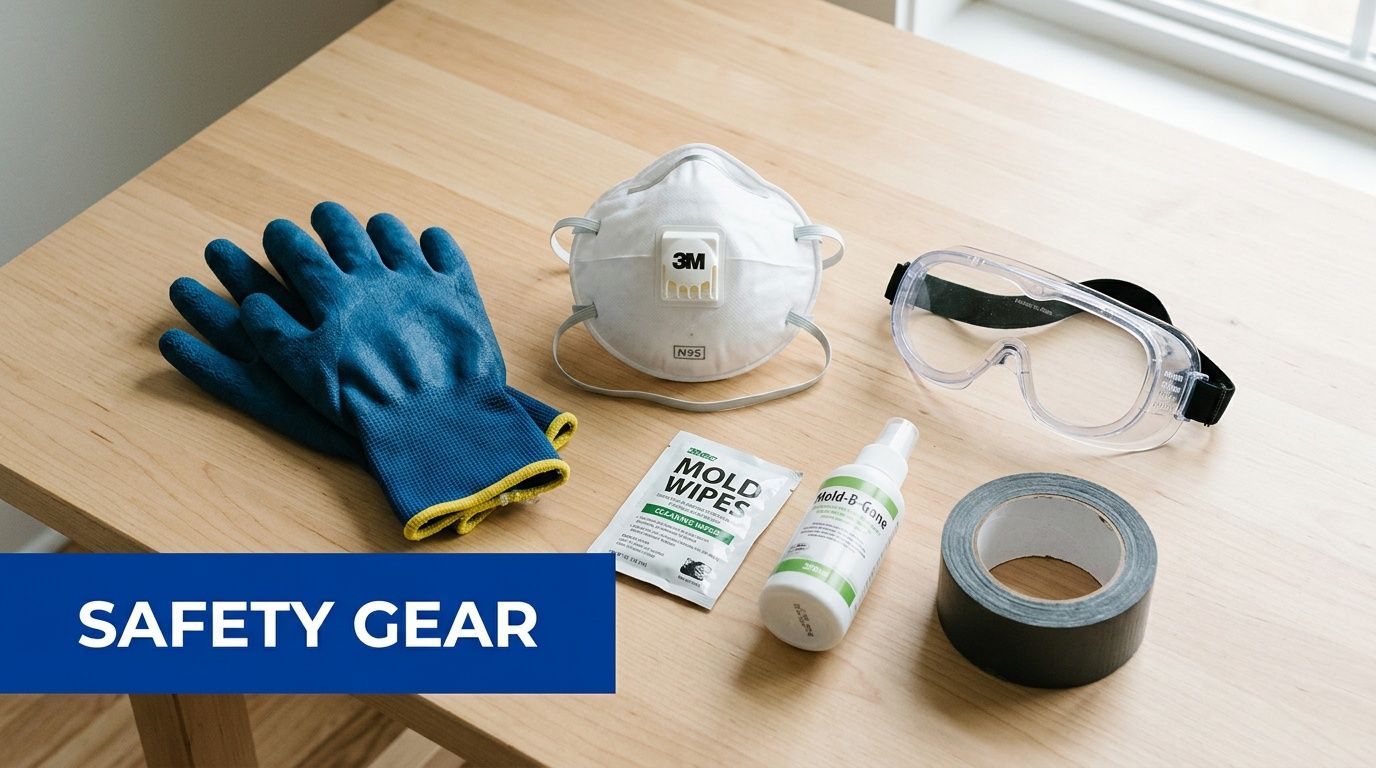
Minimum protective gear
Proper DIY mold cleanup requires wearing at least a NIOSH-approved N95 respirator, non-latex vinyl or nitrile gloves, and goggles with complete eye protection to reduce inhalation, skin contact, and eye exposure, according to the CDC mold cleanup guidance.
That minimum matters because each item protects a different route of exposure:
- Respirator: Reduces what you inhale while scrubbing or removing contaminated contents
- Gloves: Prevent direct skin contact with contaminated debris and cleaning agents
- Goggles: Protect your eyes when loosened particles and droplets come off the surface
If you're reviewing workplace-grade expectations for hazardous tasks, these personal protective equipment standards help explain why experienced crews don't improvise with paper masks or open-sided eyewear.
Basic containment before any cleaning
Under-sink jobs are small, but they can still spread contamination if done carelessly. Professionals isolate the work area because mold doesn't stay politely where you found it once brushing starts.
Use a simple containment setup for minor work:
- Remove cabinet contents carefully and bag any porous items that show visible contamination.
- Protect adjacent flooring with plastic sheeting or disposable drop material.
- Close off the immediate area as much as the kitchen layout allows.
- Avoid fans that blow across the room during active scrubbing because they can distribute particles before cleanup is complete.
Painting or caulking over moldy surfaces before cleaning only buries the problem briefly. It also tends to fail visibly later.
One more safety point matters here. If you choose a bleach solution for hard surfaces, the CDC advises using no more than 1 cup of household laundry bleach in 1 gallon of water, and never mixing bleach with ammonia or other cleaners because that can create poisonous gas, as explained in the earlier Cleveland Clinic source.
Containment sounds excessive until you've seen a minor cabinet cleanup turn into a larger housekeeping and air-quality issue. That's why protocol comes first.
A Guide to Safe Removal for Minor Mold Issues
A homeowner can sometimes handle a small surface-level spot of black mold under sink conditions, but only when the growth is on a solid, non-porous, structurally sound surface. These steps are not the right approach for drywall, raw wood, particleboard, or a cabinet base that's soft, swollen, or deteriorating.
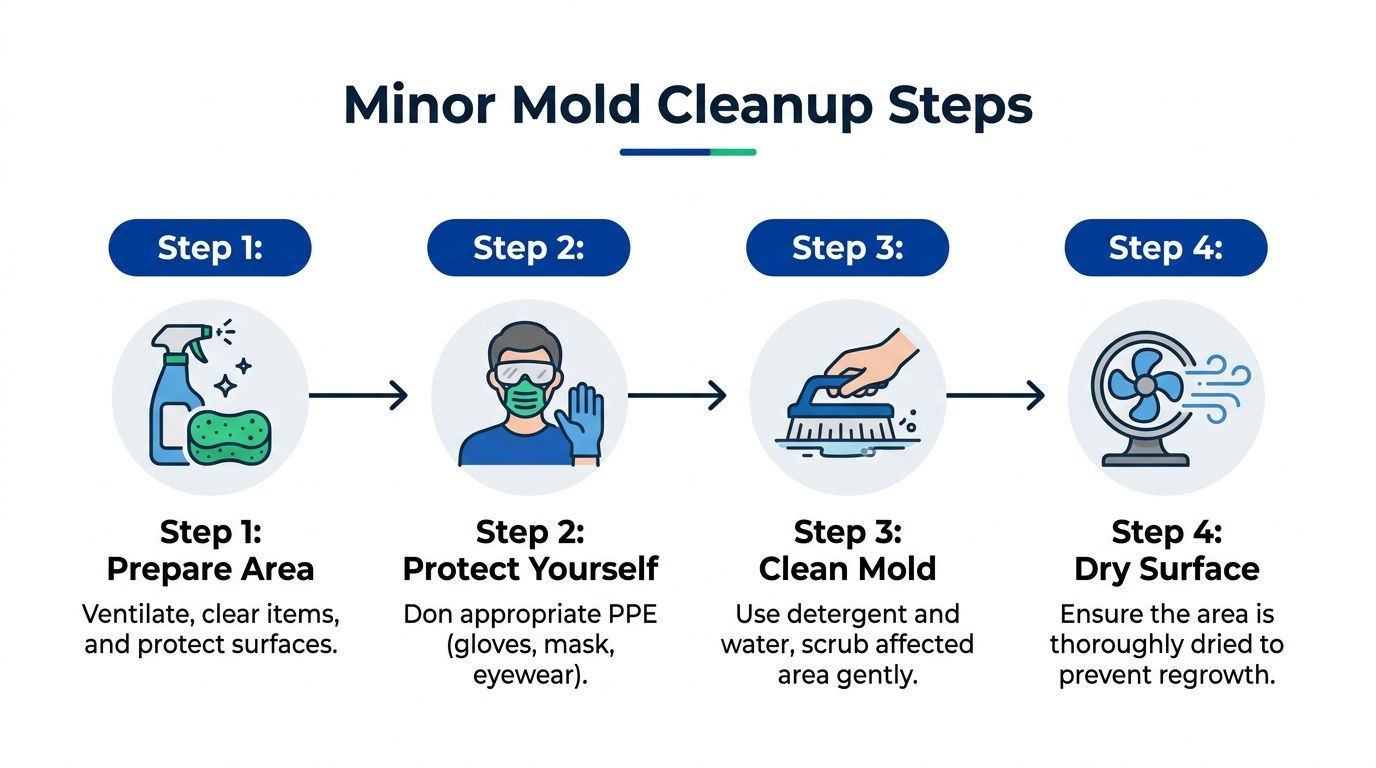
What has to happen before cleaning
Professional mold remediation under sinks achieves 85–95% success rates when strict protocols are followed, specifically the mandatory elimination of the moisture source before any cleaning begins. Without fixing the leak first, remediation failure is nearly 100% because moisture reintroduction guarantees regrowth within days to weeks, according to this under-sink remediation success guide.
That's the clearest line in the whole process. If the drip, condensation, or fitting leak is still active, don't clean yet.
For a visual walkthrough, this short video can help orient you before you start work:
A safe process for minor non-porous surface mold
Follow this sequence only if the affected material is not porous and not damaged.
Stop the water source first
Tighten loose connections or replace failed washers before touching the mold. If water returns, the mold returns.Empty the cabinet completely
Remove everything stored below the sink. Discard porous storage items like cardboard if they're contaminated because they can hold spores.Apply the cleaning solution
Use a solution of 1 cup distilled white vinegar per spray bottle or a dedicated biocide. Let it soak for 10 minutes before scrubbing, as outlined in the same Bowerman remediation guide.Scrub hard surfaces thoroughly
Use a stiff brush on the affected non-porous area. Don't just wipe the discoloration lightly. You need mechanical removal.Dry the area completely
Use fans or dehumidifiers with the cabinet doors open for at least 24 hours so residual moisture doesn't remain trapped.
What people do that causes the mold to come back
The recurring mistakes are predictable:
- Cleaning before plumbing repair: This is the fastest way to lose time.
- Using the same method on wood and particleboard: Porous damaged materials usually need removal, not scrubbing.
- Leaving dampness behind: A surface can look clean and still remain wet enough for regrowth.
- Ignoring condensation: Cold water lines can sweat in humid weather. Foam pipe sleeves can help prevent that moisture cycle.
The cleanup isn't finished when the stain is gone. It's finished when the area is dry and the moisture source is controlled.
If any step reveals hidden softness, crumbling board, or staining that disappears behind the back wall, stop there. That's outside the minor-cleanup category.
After the Cleanup Insurance Repair and Prevention
Once the visible mold is addressed, the next phase is documentation, repair, and prevention. During this phase, homeowners often rush. They want the cabinet to look normal again, so they reinstall supplies, close the doors, and move on. If the repair side isn't handled correctly, the same problem returns behind fresh paint or under a replacement liner.
Document before repairs begin
Take clear photos of the affected area before cleanup, during material removal, and after drying. Keep notes on where the moisture came from, what materials were affected, and which parts had to be discarded. If the loss may involve a claim, organized records matter.
A review of mold remediation insurance coverage can help you understand what carriers often look for when water damage and mold are part of the same event.
If the moisture source is a plumbing failure rather than ambient humidity, quick repair is part of prevention. For homeowners dealing with an active fixture issue, expert faucet repair for your home can be a useful starting point to stop repeat water intrusion.
Repair the structure, not just the finish
This is the part many DIY guides understate. If the cabinet floor, backing, or adjacent drywall is compromised, replacement is often the correct repair. Painting over stains or laying a mat over a soft cabinet base doesn't restore structural integrity.
Use this rule of thumb:
- Keep and monitor when the surface is solid, non-porous, and fully dried
- Remove and replace when the board is warped, soft, crumbling, or permanently swollen
- Investigate further when staining tracks into wall penetrations, floor seams, or hidden corners
Prevention that actually works
Mold growth under kitchen sinks can begin in as little as 24 to 48 hours once moisture, organic material, and time are present. The CDC recommends maintaining indoor humidity at no higher than 50% to help prevent growth, according to this guidance on mold under sinks and humidity control.
That's why prevention has to be practical, not decorative.
- Check supply lines and traps regularly: Small drips do real damage when they go unnoticed in dark cabinets.
- Watch condensation on cold lines: If pipes sweat, insulation can prevent repeated dampness.
- Keep airflow moving: Don't pack the cabinet so tightly that moisture stays trapped.
- Avoid absorbent storage: Cardboard and paper products under sinks collect moisture and hold contamination.
- Inspect after any plumbing work: A loose connection after a repair can create a hidden problem fast.
More than just mold removal, the aim is a dry cabinet, sound materials, and a setup that won't support regrowth.
Restoring Safety to Your Home
Black mold under sink problems are manageable when the response is calm and disciplined. Identify the moisture source, judge the condition of the cabinet materials accurately, protect yourself before disturbing anything, and don't mistake surface cleaning for true remediation when the wood core is failing.
For broader moisture control habits that help reduce repeat problems, Survey Merchant's condensation guide is a helpful reference. The safest path is the one that deals with both contamination and the conditions that allowed it to start.
If you're dealing with black mold under a sink and the situation involves structural damage, hidden spread, or health concerns, 360 Hazardous Cleanup can help you move from uncertainty to a safe, documented solution. Their team handles mold remediation with the same safety-first, compliance-driven approach required in higher-risk cleanup work, while guiding property owners through assessment, containment, and the next repair steps with clarity and compassion.