You walk into the bathroom, notice a dark line creeping along the caulk or a blotchy patch above the shower, and your first thought is usually simple: can I just clean this myself?
Sometimes you can. Sometimes you absolutely shouldn't.
That uncertainty is what makes mold removal in bathroom spaces so stressful. Bathrooms are supposed to feel sanitary. When mold shows up there, people often swing between two bad instincts. One is panic. The other is minimizing it as a housekeeping issue. The safest response sits in the middle: treat it seriously, assess it carefully, and decide based on risk, not guesswork.
The Unwelcome Discovery of Bathroom Mold
You step into the bathroom after a shower and spot a dark line at the caulk, a stain above the fan, or speckling at the ceiling corner. In that moment, the problem feels cosmetic. It may not be.
Bathroom mold is common in homes with daily humidity swings, but frequency does not reduce risk. What matters is whether the growth is superficial or whether it points to a moisture problem inside drywall, behind tile, under flooring, or around plumbing penetrations. I tell homeowners to treat that first discovery like a risk signal, not a cleaning assignment.
That distinction matters for health, for property damage, and sometimes for insurance. If mold followed a slow leak, toilet overflow, failed shower pan, or another documented water event, the way you respond in the first day can affect whether damage is easier to prove later. Photos, moisture history, and a clear record of what was wet often matter as much as the visible staining itself.
If the growth appeared after a leak or repeated dampness, the hidden dangers of mold after water damage explains why visible spotting can be only one part of the loss.
Quick scrubbing has its place. It also has limits.
On non-porous surfaces, a small amount of surface mold may be manageable with the right containment and protective steps. On drywall, wood trim, insulation, vanity backing, or any material that stays damp, wiping the surface can leave the underlying colony in place and send spores into the air. That is where many DIY attempts go wrong. The room looks cleaner for a week, then the staining returns because the moisture source never stopped.
Practical rule: If the plan is only to spray and wipe, stop and identify the water source first.
Bathrooms create a false sense of safety because they are cleaned often. Mold does not care how often a room is disinfected. It responds to moisture, organic material, temperature, and time. Once those conditions are present, the right response is a calm one: protect occupants, document what you see, and decide whether the issue belongs in the DIY category or the professional remediation category.
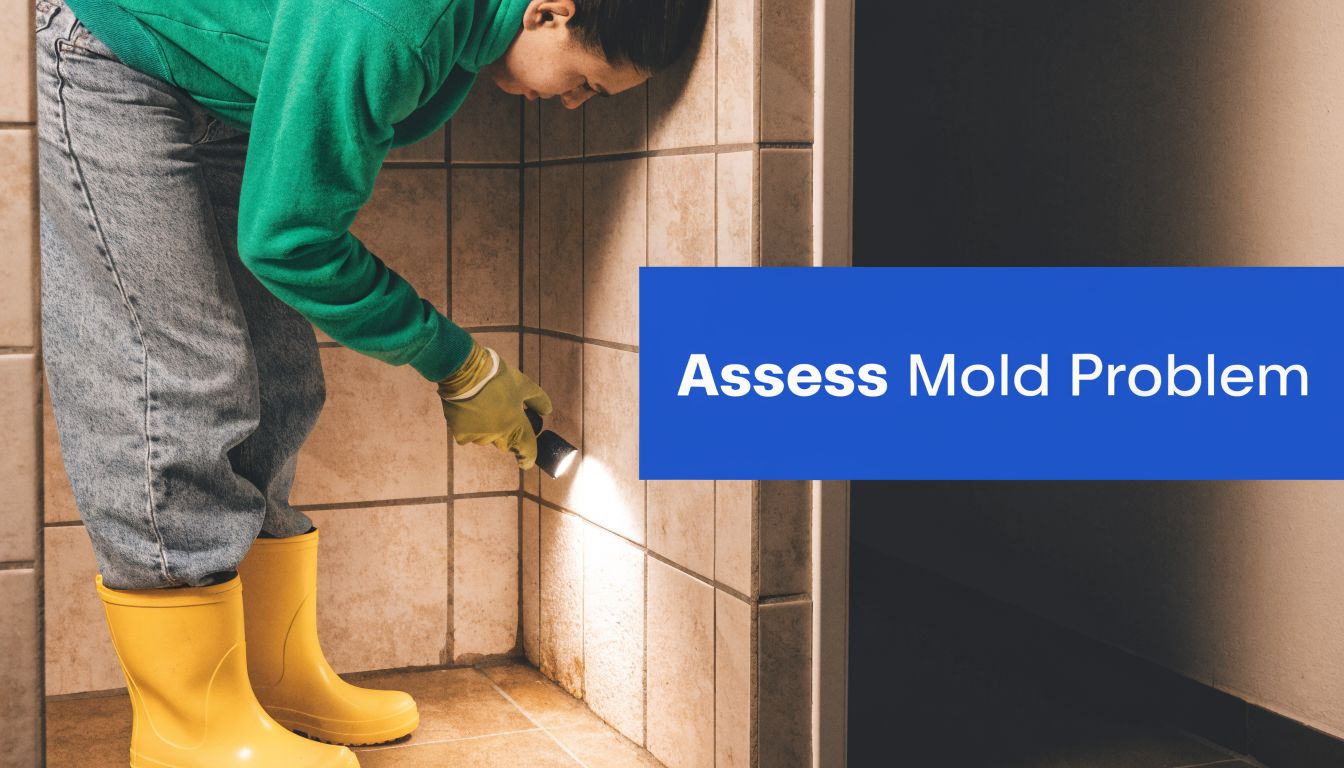
How to Properly Assess a Bathroom Mold Problem
A bathroom mold assessment is a risk decision before it is a cleaning decision. The questions that matter are simple. How far has it spread, what materials are involved, and does the moisture problem point to a maintenance issue, an active leak, or a loss that may need to be documented for insurance.
Do not spend time trying to identify mold species by color. A dark patch on caulk, drywall, or a ceiling corner does not confirm what it is, and it does not change the first decision you need to make. You need to determine whether the problem appears limited and surface-level, or whether there are signs of hidden growth, damaged porous materials, or conditions that put occupants at higher risk.
One threshold matters right away. Once visible growth covers a larger area, the job often moves out of the DIY category because disturbing that material can spread contamination through the room and into adjacent spaces. In practice, I treat larger bathroom mold findings as a remediation issue, not a housekeeping issue, especially when drywall, vanity backing, insulation, or subfloor materials are involved.
What to check before touching the area
Start with a flashlight, a phone camera, and a measuring tape. Document first. Homeowners often regret cleaning too early because they erase evidence of the moisture path and make later insurance discussions harder.
Check these points in order:
- Surface area: Measure the visible growth and photograph it from close range and from the doorway for context.
- Material type: Tile, metal, and glass are very different from drywall, wood trim, MDF vanities, and painted ceilings. Non-porous materials may be cleanable. Porous materials may need removal if growth has penetrated below the surface.
- Moisture clues: Look for peeling paint, soft wallboard, loose base trim, swollen cabinetry, failed caulk lines, cracked grout, and staining around plumbing penetrations.
- Odor: A persistent musty smell usually means the visible area is not the full extent.
- Occupant risk: If anyone in the home has asthma, COPD, immune suppression, or is recovering from illness, the tolerance for DIY disturbance should be much lower.
- Source category: Separate condensation from a plumbing leak, overflow, or another water event. That distinction affects repair urgency, documentation, and sometimes coverage questions.
Dark staining often causes the most panic. The safer approach is to judge the material and the exposure risk, not the color alone. If you are trying to sort out whether discoloration on painted drywall or ceiling corners may be more than surface spotting, this guide to black mold on walls and what it can indicate can help you compare common patterns.
Signs the visible spot is not the full problem
Bathroom mold often shows up where air movement is poor, but the underlying problem may sit behind the finish materials. A two-inch patch beside a vanity can trace back to a slow supply-line leak inside the cabinet. Repeated staining above a shower can point to insulation gaps, failed exhaust, or moisture moving from the attic side.
| Sign | What it often means |
|---|---|
| Musty smell after cleaning | Hidden dampness remains |
| Paint bubbling or flaking | Moisture trapped behind coating |
| Caulk repeatedly darkens | Ongoing condensation or poor ventilation |
| Wall feels soft | Water intrusion into porous material |
| Growth returns quickly | Source moisture was never corrected |
Hidden growth changes the response.
If you remove an access panel or look under a sink and find widespread staining, active wetness, deteriorated wallboard, or contamination extending beyond the original patch, stop there. That is the point where safety, containment, and proper documentation matter more than speed. Certified remediators can assess how far the damage extends, and that record may also help if the bathroom mold is tied to a covered plumbing failure rather than long-term neglect.
A Safety-First Protocol for Small-Scale DIY Mold Removal
If the affected area is limited, on a non-porous surface, and not connected to sewage or another contamination event, a careful DIY response may be reasonable. The key word is careful. Safe mold removal in bathroom spaces is less about scrubbing hard and more about controlling spores, choosing the right method for the material, and drying the area fully afterward.
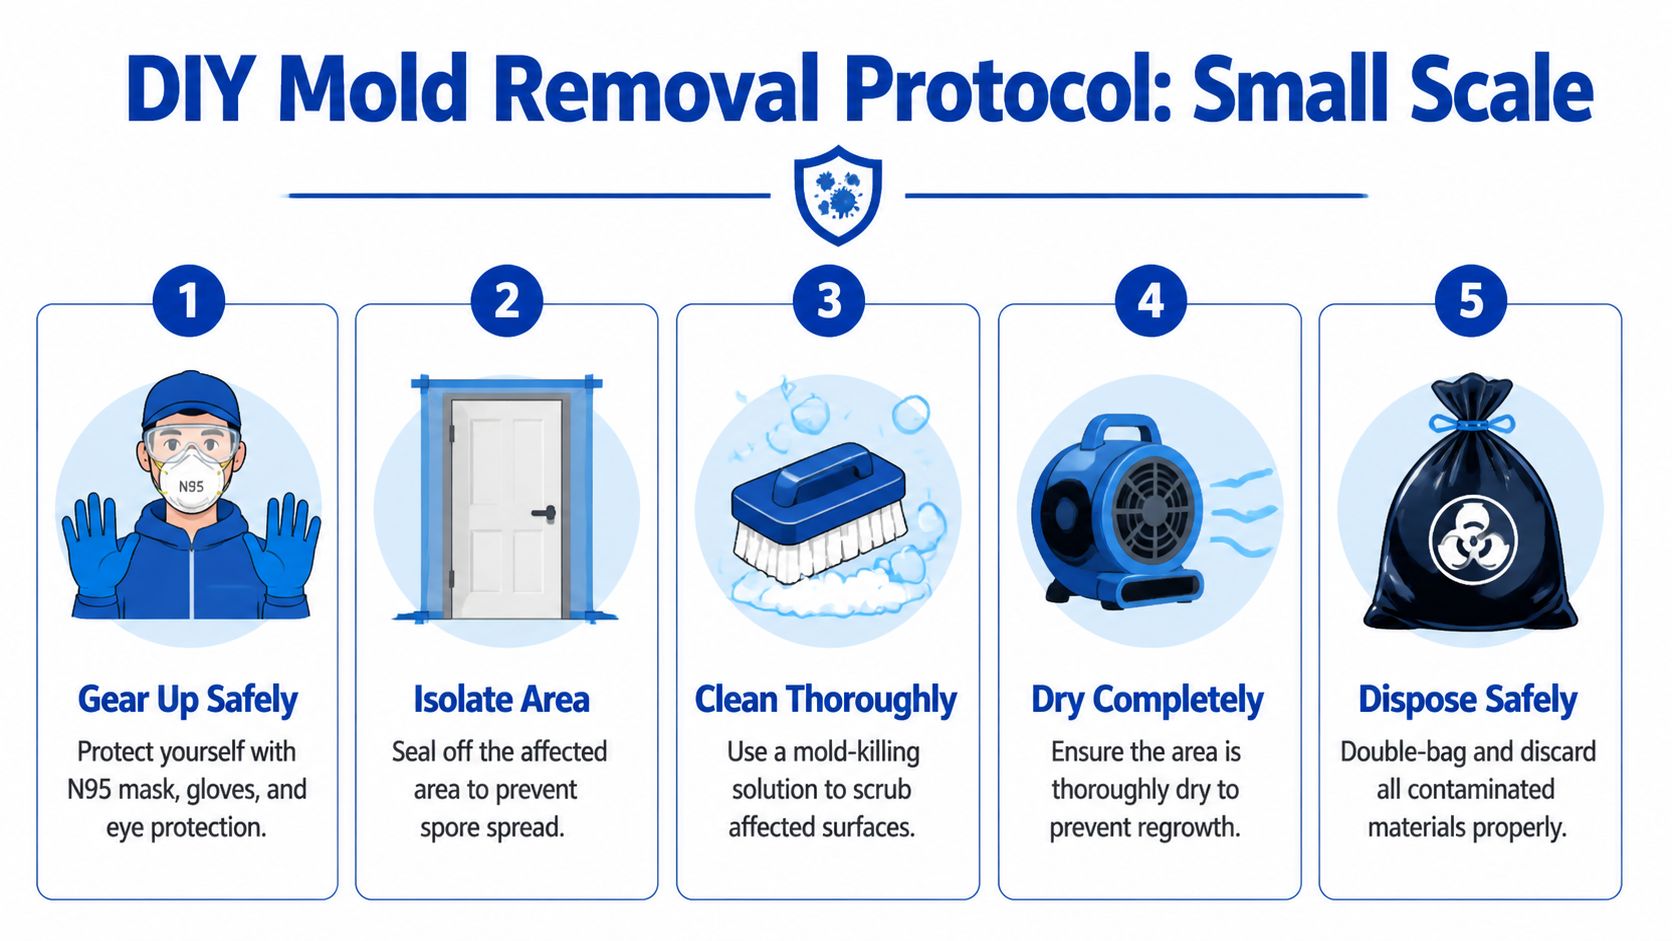
What to wear and how to isolate the area
Even a minor job deserves basic personal protection. For small cleanups, use an N95 respirator, gloves, and eye protection. Keep the bathroom door closed if possible, and avoid running your home's central air in a way that could pull disturbed spores into other rooms.
Set up your work area before you spray anything:
- Remove loose textiles like towels, bath mats, and washable curtains.
- Open local ventilation if it exhausts outdoors.
- Keep children, older adults, and anyone with respiratory sensitivity away from the room during cleanup.
- Have disposal bags ready before you start.
A lot of failed DIY jobs come from one mistake: people begin cleaning before they've decided what can be cleaned.
Clean hard surfaces. Remove porous ones
Bathroom mold remediation requires different methods for different materials. Porous materials like drywall, joint compound, and subflooring must be physically removed and discarded because mold penetrates their structure, as outlined in this step-by-step remediation guide.
That distinction matters:
- Usually cleanable surfaces: tile, glass, metal fixtures, porcelain
- Usually not salvageable when moldy: drywall, insulation, ceiling tile, water-damaged wood trim, underlayment
If you're dealing with ceiling spotting, this guide on how to permanently remove mold from bathroom ceiling helps clarify when cleaning is enough and when material replacement is the safer choice.
Here's a visual walkthrough of a basic small-scale process:
A practical cleaning sequence for minor growth
For hard, non-porous surfaces, work in a controlled order.
- Vacuum only with HEPA equipment if you have it: Standard household vacuums can spread spores.
- Use a mold-appropriate cleaning solution: For small jobs, guidance allows options such as vinegar, soap, or diluted bleach for appropriate hard surfaces. Never mix chemicals.
- Scrub physically: Dwell time helps, but agitation removes adhered growth.
- Wipe and dispose of cloths safely: Bag contaminated wipes, sponges, and disposable PPE.
- Dry the area completely: The cleaning step fails if moisture remains.
Surface shine is not proof of remediation. If the substrate stays damp, mold often returns.
Bleach is one of the biggest points of confusion. On hard, non-porous bathroom surfaces, it may be used in diluted form for small cleanups. On porous materials, it doesn't solve the deeper contamination because it can't correct what has penetrated below the surface. That's why spraying bleach on drywall stains is often a cosmetic move, not a remediation method.
What successful DIY work looks like
A successful small cleanup leaves you with more than a cleaner-looking wall. It leaves you with a dry room and a corrected moisture condition.
After cleanup:
- Run ventilation until surfaces are fully dry
- Inspect caulk, grout, and seals
- Repair the leak, drip, or condensation pattern that fed the growth
- Watch the area closely over the next several weeks
If staining returns, odor persists, or the material remains soft, stop treating it as a cleaning job.
When You Must Call a Professional Mold Remediation Service
A bathroom can look like a simple cleaning project and still be unsafe to handle without containment. I see that mistake often after a homeowner wipes away visible staining, only to find the odor worsening, drywall softening, or a plumber opening the wall and exposing a much larger contaminated area.
If mold in a bathroom is tied to hidden moisture, damaged porous materials, or contaminated water, the job shifts from cleaning to remediation. That distinction matters for health, for insurance, and for whether the work can stand up to scrutiny later if a landlord, carrier, or inspector asks how the contamination was handled.
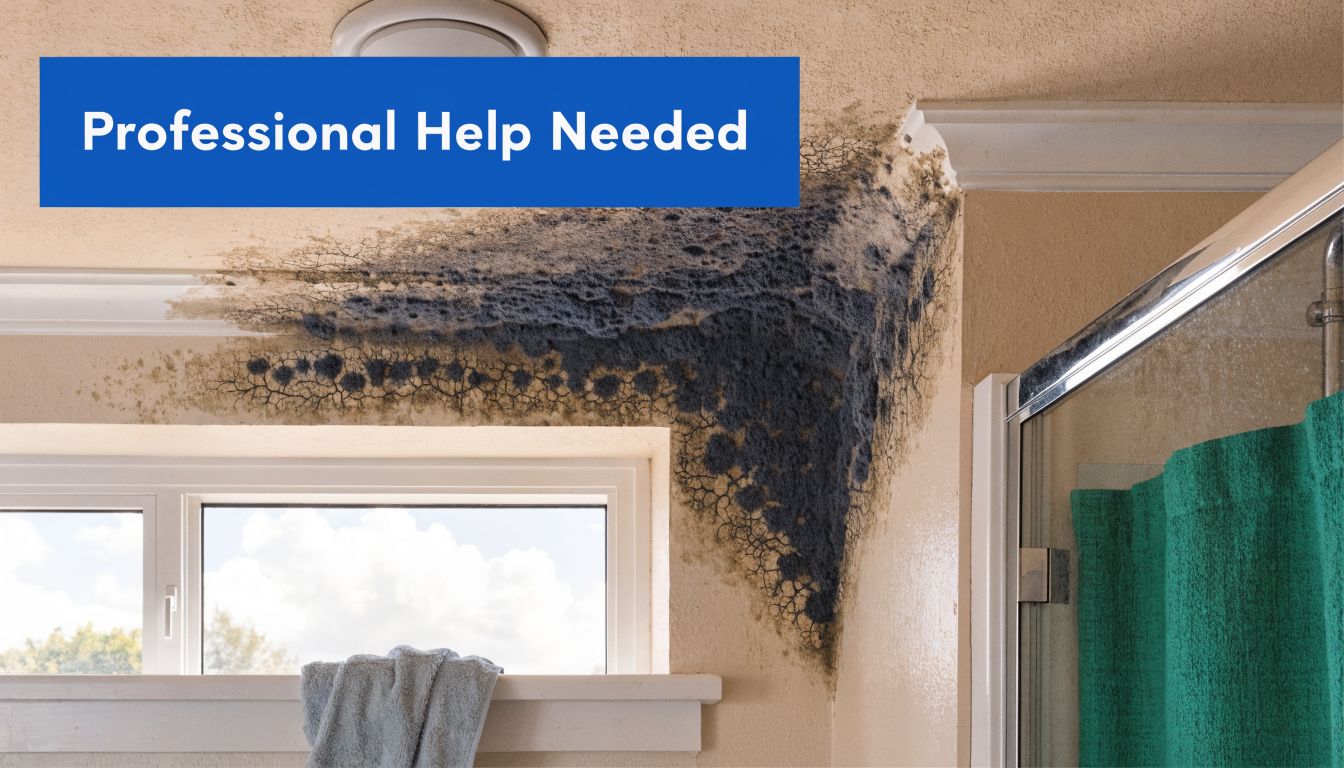
Situations that move beyond DIY
The decision point is not just how ugly the mold looks. The critical question is whether you can remove it safely without spreading spores, missing hidden damage, or disturbing material that should be removed under controlled conditions.
Call a qualified remediator if any of the following apply:
- The affected area exceeds what guidance treats as a small cleanup
- Drywall, trim, insulation, wood subfloor, or other porous materials are involved
- The musty odor is stronger than the visible growth
- Anyone in the home has asthma, immune compromise, COPD, or significant respiratory sensitivity
- The bathroom had an overflow, sewage backup, or other contaminated water event
- Mold returns after cleaning, repainting, or replacing caulk
- You see bubbling paint, soft walls, swollen baseboards, or recurring moisture with no clear source
The sewage issue deserves special attention. Once bathroom mold is connected to blackwater or suspected waste contamination, the risk profile changes. You may be dealing with mold, bacteria, aerosolized contaminants, disposal rules, and occupant exposure at the same time. Homeowners often call this "bad mold," but the more useful distinction is whether the job now falls into a biohazard category that needs containment and trained handling. This guide explaining the difference between normal mold and biohazard mold and when to call a pro gives a clear overview of that line.
What professionals do that homeowners usually cannot replicate safely
Professional mold remediation is controlled removal. The goal is not to make the bathroom look clean. The goal is to remove contaminated material, prevent cross-contamination, correct the moisture source, and document what was done.
That process often includes containment barriers, negative air or HEPA filtration, moisture mapping, selective demolition, and cleaning methods chosen for the material involved. Those steps matter because spores spread easily once wet drywall, insulation, or trim are disturbed. A bathroom is also a small enclosed space, which raises the chance of exposing the rest of the home if the work is done casually.
| Professional control | Why it matters |
|---|---|
| Containment barriers | Limits spore and dust migration into bedrooms, hallways, and HVAC pathways |
| HEPA air filtration | Captures fine particulates released during demolition and cleaning |
| Moisture mapping | Identifies wet materials behind tile, baseboards, cabinets, and wall cavities |
| Controlled demolition | Removes unsalvageable porous material with less spread of debris |
| Written documentation | Supports insurance claims, tenant files, and post-remediation records |
This risk-management approach is especially important in rentals, multifamily housing, healthcare settings, and commercial properties. In those environments, the question is not only "Can someone scrub this?" The question is whether the owner can show that occupant safety, contamination control, and material disposal were handled properly.
What a proper remediation scope should include
Before hiring anyone, ask how they determine the work area, what materials they expect to remove, how they control airborne spread, and what records you will receive at the end. Vague answers are a warning sign.
A sound scope of work should include:
- Inspection with moisture assessment
- A defined containment plan for the affected area
- Removal of unsalvageable porous materials
- HEPA filtration and detailed cleaning of remaining surfaces
- Drying and correction of the moisture source
- Written records of the work performed, including removed materials
360 Hazardous Cleanup is one example of a company that provides mold remediation with assessment, containment, HEPA air filtration, removal of contaminated materials, and antimicrobial treatment. Those elements are worth listening for from any contractor because they show the company understands the job as contamination control, not cosmetic cleanup.
If a contractor only talks about spraying, fogging, or "killing mold" without discussing removal, drying, and documentation, keep looking. In bathroom mold work, the safest hire is usually the one who explains limits, not the one who promises the fastest wipe-down.
Navigating Insurance and Documentation for Mold Damage
Once a professional is involved, the next pressure point is usually paperwork. Homeowners worry about coverage. Landlords worry about liability. Facility managers worry about records, tenant communication, and whether the file will stand up if a carrier, regulator, or attorney reviews it later.
The answer in all three settings is the same: document early and document consistently.
What to gather before cleanup begins
Take photographs before anything is removed. Include wide shots of the room and close-ups of the affected materials. If the mold followed a plumbing leak, overflow, or maintenance issue, preserve that context too.
Your file should ideally include:
- Photos of visible damage
- Dates when the issue was discovered
- Any leak, overflow, or maintenance history
- Invoices or emergency service records
- Moisture readings and remediation notes from the contractor
- A list of removed materials and affected rooms
The remediation side matters because good documentation doesn't just support payment. It helps prove the problem was handled properly. That's important in rental housing, multifamily properties, and commercial sites where future occupants may ask what happened and whether the area was restored safely.
Why the contractor's paperwork matters
A professional remediation record should show what was found, what was removed, how the area was contained, and what drying or cleaning steps were used. That record helps insurers understand the difference between cosmetic cleaning and actual mitigation.
The strongest project files usually include:
| Documentation item | Why insurers and owners care |
|---|---|
| Site photos | Establishes scope and condition |
| Moisture readings | Shows the source problem was measured |
| Material removal record | Confirms what was discarded |
| Product and treatment notes | Shows how surfaces were cleaned |
| Final job summary | Creates a clear claim narrative |
If a contractor can't explain what was wet, what was removed, and how the area was dried, the file is weak before the claim review even starts.
A remediation company can also help clients communicate with carriers in a more precise way. Instead of vague statements like "there was mold in the bathroom," they can describe the moisture source, affected materials, contamination controls used, and why certain materials couldn't be salvaged. For many owners, that's the difference between a confusing call and a structured claim discussion.
If you're preparing for that conversation, this guide on how to talk to your insurance company about cleanup services, insurance tips, common pitfalls and what you should know is a practical starting point.
How to Prevent Future Bathroom Mold Growth
A bathroom can look clean and still be one shower away from another mold problem. Prevention starts after cleanup, not before. If humidity stays trapped, if water keeps getting behind caulk, or if the exhaust fan is weak or poorly ducted, the same conditions that fed the first growth are still in place.
For homeowners, this is also a risk-management issue. Repeated mold in a bathroom can shift a claim discussion from a sudden water event toward long-term maintenance failure. That distinction matters for insurance, and it matters for health. The EPA’s basic mold guidance points back to moisture control for a reason. According to the EPA's mold cleanup guidance on basic mold cleanup steps, mold problems return when the moisture source is left in place.
The habits that actually matter
Daily prevention is simple, but it has to be consistent.
- Run the exhaust fan during showers and long enough afterward to clear humidity: A fan only helps if it vents outdoors and moves air out of the room.
- Fix small leaks quickly: A slow drip at a supply valve, faucet base, or toilet connection can keep cabinetry, trim, and subfloor materials damp.
- Dry surfaces that stay wet: Shower corners, window tracks, grout lines, and the base of toilets are common trouble spots.
- Use a hygrometer: It gives a real humidity reading so decisions are based on conditions, not guesswork.
- Replace failed caulk and damaged grout: These gaps let water pass into wall cavities and behind finishes where mold can grow out of sight.
Some bathrooms need more than better habits. If mirrors stay fogged for long periods, paint keeps peeling, or condensation forms on walls and windows, the ventilation system may be undersized, blocked, or badly installed. In those cases, repainting or recaulking without fixing airflow usually wastes money.
Prevention is a whole-house issue too
Recurring bathroom mold often points to a larger moisture pattern in the home. High indoor humidity, poor attic or crawlspace ventilation, and persistent dampness in lower levels can keep moisture pressure high enough that the bathroom becomes the first visible warning sign. Homeowners seeing that pattern should also review effective basement moisture control, especially if more than one room feels humid or develops musty odor.
I tell clients to treat prevention like documentation, not just housekeeping. Note recurring condensation, save receipts for fan replacement or plumbing repair, and take photos if staining returns in the same location. If a problem grows beyond routine surface spotting, those records help support a faster inspection, a clearer remediation scope, and a stronger insurance conversation.
Frequently Asked Questions About Bathroom Mold
Can I paint over bathroom mold
No. Paint only covers staining. It does not remove contaminated material, kill growth inside porous surfaces, or fix the moisture condition that caused it. In practice, painted-over mold often returns as peeling, bubbling, discoloration, or a musty odor, and that delay can make an insurance claim or landlord dispute harder to document clearly.
Will mold go away if I dry the room out
Drying the bathroom helps stop active growth, but existing contamination still has to be addressed. On hard surfaces, that may mean careful cleaning. On drywall, caulk, insulation, or other porous materials, drying alone often leaves damaged material in place, which matters if someone in the home has asthma, allergies, or other respiratory sensitivity.
Is bleach enough for mold removal in bathroom areas
Bleach has limited use. It may clean minor residue from some non-porous surfaces, but it does not reliably solve mold that has penetrated porous material or spread behind finishes. It can also create a false sense of resolution if staining lightens while the moisture source and hidden growth remain.
What if the mold keeps coming back in the same spot
Repeated growth in one area usually means the underlying moisture problem was never fully corrected. I treat that as a warning sign, not a housekeeping failure. The cause may be a slow plumbing leak, chronic condensation, wet backing behind tile, or damp drywall inside the wall cavity. At that point, the question shifts from cleaning to whether material needs to be opened, documented, and professionally remediated.
Do landlords need to treat bathroom mold seriously
Yes. Mold complaints can quickly become habitability, liability, and documentation issues. Property owners should respond promptly, record the condition, investigate the moisture source, and avoid cosmetic cover-ups that leave damaged material in place. If the area is more than a small, contained surface issue, bringing in a qualified remediation contractor protects both the occupant and the owner.
How do I choose the right exhaust fan
Choose a fan sized for the room, and make sure it vents outdoors rather than into an attic or wall cavity. Noise level, run time, and humidity sensing also matter because a fan that is too loud or shuts off too soon often goes unused. If you're comparing options, Western Bathroom Renovations' guide to fans is a useful planning resource for understanding what to look for.
If the situation feels unclear, treat that uncertainty seriously. Bathroom mold can sit on the line between a small cleanup job and a regulated remediation issue, especially when there is hidden moisture, tenant involvement, health symptoms, or a possible insurance claim. 360 Hazardous Cleanup handles mold, biohazard, and contamination cases with a safety-first process, clear documentation, and support for homeowners who need to understand what should be cleaned, what should be removed, and what needs to be recorded before the next step.