Permanently removing mold from your bathroom ceiling requires more than simply wiping away the visible spots. The definitive solution involves identifying and correcting the underlying moisture issue that feeds the growth. Only then can you effectively clean the existing contamination and ensure it does not return.
Think of it this way: scrubbing the mold is like bailing water out of a boat with a hole in it. You are addressing a symptom, not solving the core problem. A professional, compliant approach is the only way to safeguard your property and health.
Why Does Mold Keep Appearing on My Bathroom Ceiling?
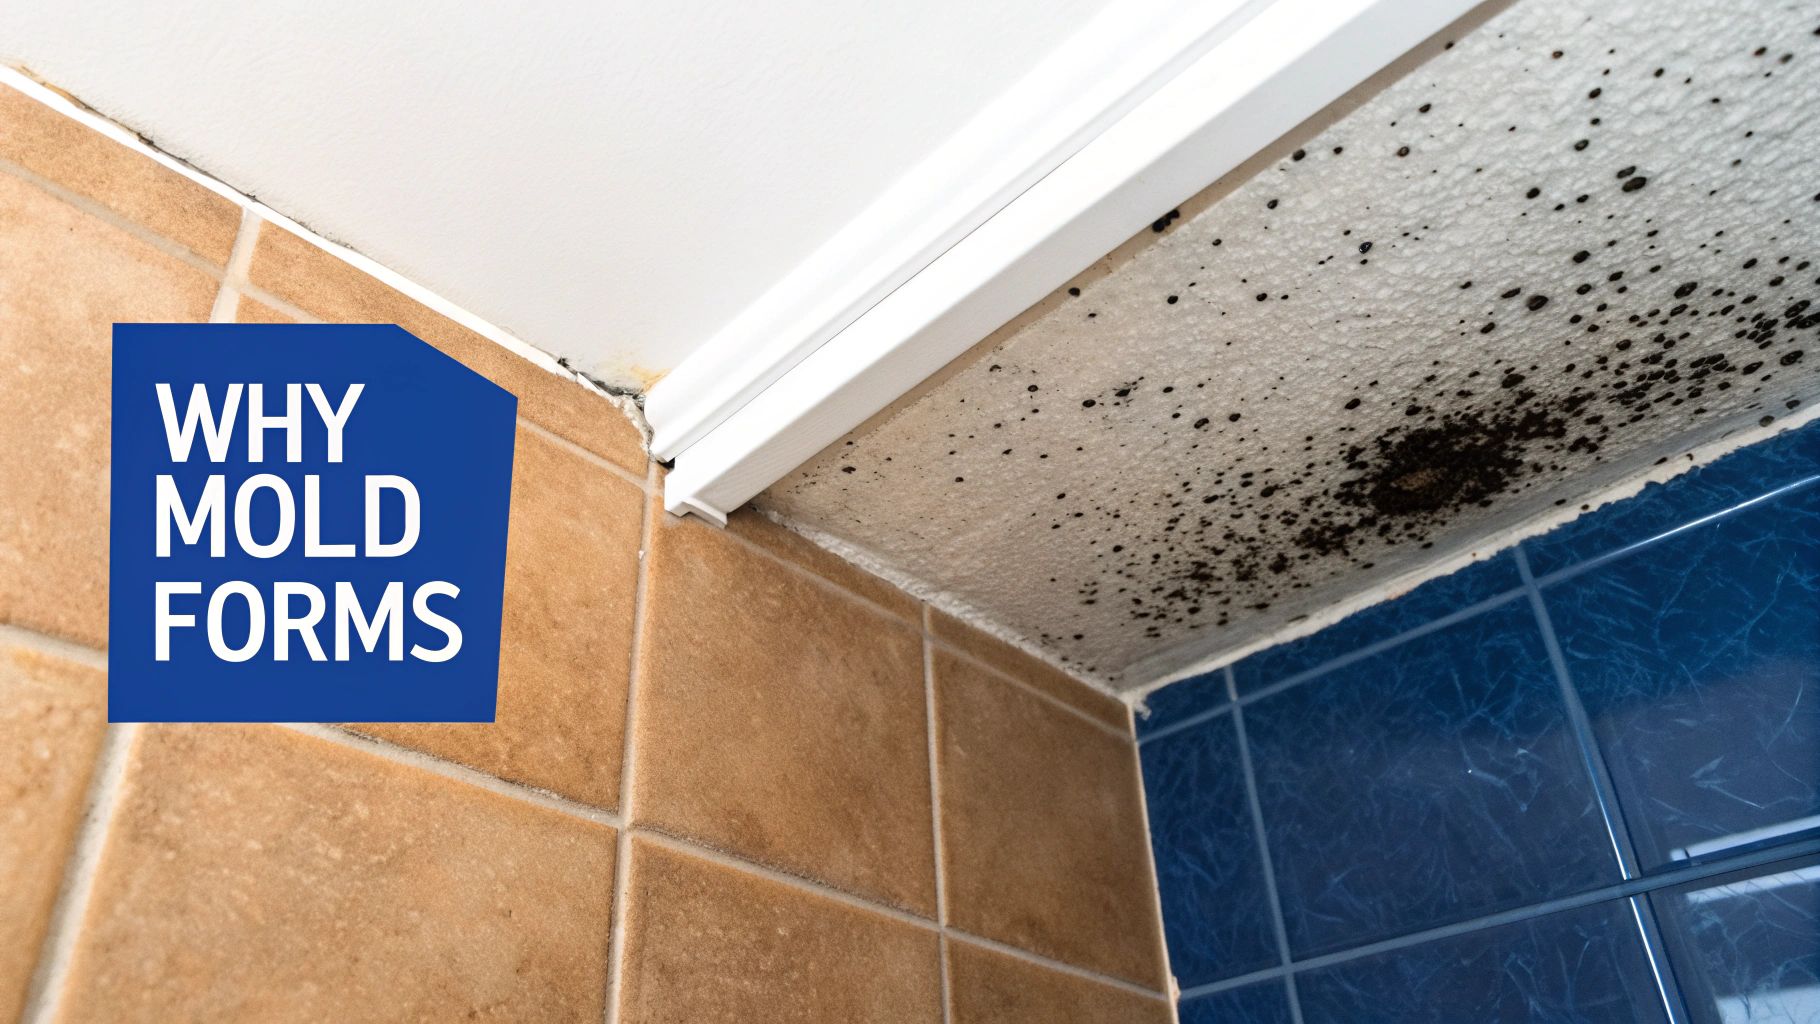
The persistent reappearance of dark spots on a bathroom ceiling is a common issue with a straightforward cause. Every hot shower releases steam, filling the room with warm, moist air. This humidity rises and becomes trapped against the ceiling, creating an ideal environment for mold spores to colonize.
Common bathroom construction materials, including drywall and ceiling paint, are porous. They absorb this moisture, sustaining a damp environment where dormant mold spores can activate and form a visible colony in as little as 24-48 hours. This process results in the tell-tale black spots and characteristic musty odor indicative of a problem.
More Than a Cosmetic Issue
It is easy to misclassify ceiling mold as a simple cosmetic flaw that can be concealed with a coat of paint. This perspective overlooks significant risks to both your property's structural integrity and your family's health. What is visible is often only a fraction of the total contamination.
Surface mold typically indicates that the underlying materials—drywall, insulation, and even wooden ceiling joists—are saturated with moisture. Over time, this can lead to material decay and structural damage, particularly if the source is a slow, hidden leak from plumbing or a compromised roof. Furthermore, active mold colonies release spores into the air, potentially degrading indoor air quality.
The Ideal Conditions for Mold Growth
Bathrooms are engineered in a way that makes them highly susceptible to mold. A single shower can elevate the room's humidity to 85-90%, the optimal range for fungal proliferation. It is therefore unsurprising that the global mold remediation market reached USD 1.23 billion in 2023 and continues to grow. In North America, it is estimated that approximately 1 in 5 homes experiences a mold issue, with bathrooms being a primary location.
If you have previously cleaned mold from your ceiling only for it to return, it is a clear indicator that the underlying moisture problem was not resolved. Professional remediation focuses on altering the environment to make it inhospitable to mold, which is the only permanent solution.
Before attempting any cleaning, the first critical step is to identify the why. Is it an underperforming exhaust fan, a hidden plumbing leak, or inadequate insulation causing condensation? Answering this question is the only way to develop a permanent solution and restore a safe environment.
Assessing the Scope and Preparing for Safe Removal
Before reaching for a cleaning solution, it is imperative to pause. Your first and most critical task is to assess the situation without disturbing the mold. Agitating a mold colony can release a significant volume of microscopic spores into the air, potentially transforming a localized issue into a whole-property contamination and creating a health risk. This initial assessment and preparation phase is what distinguishes a temporary fix from a permanent, professional solution.
Carefully observe the ceiling. Is it a single, small patch, or are there multiple areas of discoloration? A widely accepted guideline is to consider the total affected area. Is it larger than approximately 10 square feet (the size of a standard bath mat)? A small, isolated area of surface mold may be manageable. However, widespread growth is a clear indicator that the visible mold is only a symptom of a much larger, often hidden, problem.
Essential Personal Protective Equipment (PPE)
Working overhead places you directly beneath the contamination. Gravity will cause spores, cleaning solutions, and debris to fall downward. The use of appropriate Personal Protective Equipment (PPE) is not a suggestion; it is a fundamental safety requirement.
- N95 Respirator: This is the minimum acceptable level of respiratory protection. Standard dust masks are ineffective against microscopic mold spores. An N95 respirator is engineered to filter these particles.
- Non-Vented Goggles: Goggles must form a complete seal around the eyes. Vented models used for general work have gaps that allow airborne spores to enter, which can cause significant eye irritation and infections.
- Durable, Non-Porous Gloves: Disposable nitrile or vinyl gloves that extend over the wrist are necessary. They provide a barrier against direct skin contact with both the mold and any chemical agents used during cleaning.
These precautions are not excessive; they are standard safety protocols. Inhaling mold spores or allowing eye contact can trigger allergic reactions and lead to more serious respiratory conditions.
When to Engage a Professional Remediation Service
There is a distinct threshold between a manageable DIY task and a situation requiring certified professionals. Attempting to remediate a large-scale problem without proper training and equipment can be costly and hazardous. If you encounter any of the following, it is time to contact a professional.
- The Mold-Affected Area Exceeds 10 Square Feet: The EPA uses this as a general benchmark for professional intervention. An area this large almost always indicates a significant, persistent moisture source that requires commercial-grade equipment and specialized knowledge to resolve.
- A Strong Musty Odor Is Present with Minimal Visible Mold: This distinct, earthy smell is a primary indicator of hidden mold growth behind drywall, within insulation, or inside the ceiling structure. Professionals use tools like moisture meters and thermal imaging to locate hidden mold without unnecessary demolition.
- The Mold Repeatedly Returns After Cleaning: If you have cleaned the area before and the mold has reappeared, the original moisture source was never eliminated. This cycle indicates a persistent problem that surface cleaning cannot solve.
- Household Members Have Pre-Existing Health Conditions: If anyone in your home has asthma, severe allergies, or a compromised immune system, do not attempt a DIY removal. The risk of aerosolizing spores and triggering a serious health event is too great.
It is also beneficial to understand the types of contamination you may be facing. While only laboratory analysis can confirm the species, you can learn more by reviewing our guide comparing mold vs. mildew vs. biohazard mold.
When a certified remediation technician arrives, their first priority is containment. They systematically isolate the work area to ensure that all contaminants are confined and do not spread to other parts of the property.
Establishing a Contained Work Zone
If you've determined the mold is a small, manageable spot, the next step is to establish a professional-grade containment zone. This is a crucial step to prevent the cross-contamination of your home with airborne spores.
First, eliminate airflow. Turn off the HVAC system and any fans near the bathroom. Next, seal the doorway using thick plastic sheeting and painter's tape to create an isolated environment. If the bathroom has a window, place a box fan in it, facing outward. This creates negative air pressure, which helps pull airborne contaminants out of the home rather than pushing them further into it.
This level of preparation may seem extensive for a small spot, but it reflects a professional, safety-first approach. It treats mold as a bio-contaminant that requires careful and methodical handling.
A Practical Guide to Removing Ceiling Mold
After a thorough assessment and the establishment of a safe, contained workspace, the process of mold removal can begin. The correct methodology depends entirely on the scale of the problem. A minor surface issue requires a different approach than a more significant infestation that necessitates professional intervention. The method chosen will determine whether the solution is temporary or permanent.
For a small area of surface mold, a self-performed cleaning may be an option. The choice of cleaning agent is critical. Many people instinctively reach for bleach, but this is a significant error on porous surfaces like drywall. The chlorine component of bleach often remains on the surface, while its water base can absorb into the material, providing moisture to deeper mold roots and promoting regrowth.
A vinegar solution or a dedicated mold cleaning agent is more effective for small, non-porous areas. The technique is to dampen a disposable cloth, not saturate it, and gently wipe the mold away. Never scrub dry mold, as this will aerosolize spores into your contained area.
This chart outlines the critical preparation steps required for both DIY and professional remediation projects before any cleaning starts.
As illustrated, assessment, personal protection, and containment are non-negotiable prerequisites for ensuring safety and preventing the spread of contamination.
The Professional Remediation Process
When confronting widespread, recurring, or deeply embedded mold, a far more rigorous, systematic approach is required. Certified remediation specialists adhere to strict industry protocols designed to eliminate contamination at its source.
The process begins with the physical removal of contaminated porous materials. Technicians will carefully cut out the affected drywall, extending 2-4 inches beyond the visible mold growth to ensure the complete removal of the mold's root system (hyphae). This is a precise, surgical procedure, not uncontrolled demolition, designed to minimize spore release.
All contaminated materials are immediately double-bagged in thick, 6-mil polyethylene sheeting and sealed before being removed from the containment zone. This is a critical protocol to prevent cross-contamination of the property.
A common DIY mistake is to paint over a mold stain. This conceals the problem but does not solve it. The mold continues to consume the organic materials in the drywall and paint, eventually reappearing on the surface.
Advanced Cleaning and Spore Removal Techniques
Once contaminated materials are removed, the focus shifts to eliminating invisible, airborne spores. Professionals deploy commercial-grade equipment, such as HEPA vacuums. Every surface within the contained area is meticulously vacuumed. These specialized machines are engineered to capture microscopic particles that are invisible to the naked eye.
This step is essential and cannot be skipped. Neglecting it is analogous to weeding a garden but leaving thousands of seeds in the soil. A standard household vacuum is not a substitute; it will capture spores and re-distribute them through its exhaust, worsening the air quality. To fully grasp the necessity of proper equipment, it is important to understand https://360haz.com/the-importance-of-personal-protective-equipment-ppe-in-mold-remediation-and-biohazard-cleanup/.
Applying EPA-Registered Antimicrobials
The final step in the cleaning process is the application of an EPA-registered antimicrobial agent to all decontaminated surfaces, such as exposed wood joists and the surrounding ceiling area. These professional-grade solutions are formulated to kill any residual spores and inhibit future growth.
This methodical, multi-step process is fundamentally different from most DIY attempts. For example, while vinegar is often recommended online, studies show it is only approximately 60% effective on surface mold. The rapid growth of the mold remediation industry is a testament to the fact that permanent removal demands this level of precision. It's estimated that up to 80% of mold problems recur because the original moisture source was not properly identified and resolved—a core component of any professional remediation plan.
For a more detailed breakdown of these steps, this practical guide to removing mold in your bathroom ceiling further illustrates why complex jobs require the expertise and equipment of trained professionals.
Eliminating Moisture to Prevent Mold's Return
The removal of visible mold is a critical step, but it constitutes only half of the solution. If the moisture conditions that enabled the mold to grow are not corrected, its return is inevitable.
Permanent mold remediation is not about cleaning; it is about moisture control.
This phase shifts the focus from treating the symptom to curing the underlying condition. Mold cannot survive without water. By identifying and eliminating sources of excess moisture, you transform the bathroom environment from a mold incubator into a space where it cannot thrive. This is the foundational principle that allows professionals to guarantee their work.
Upgrading Your Bathroom's Ventilation
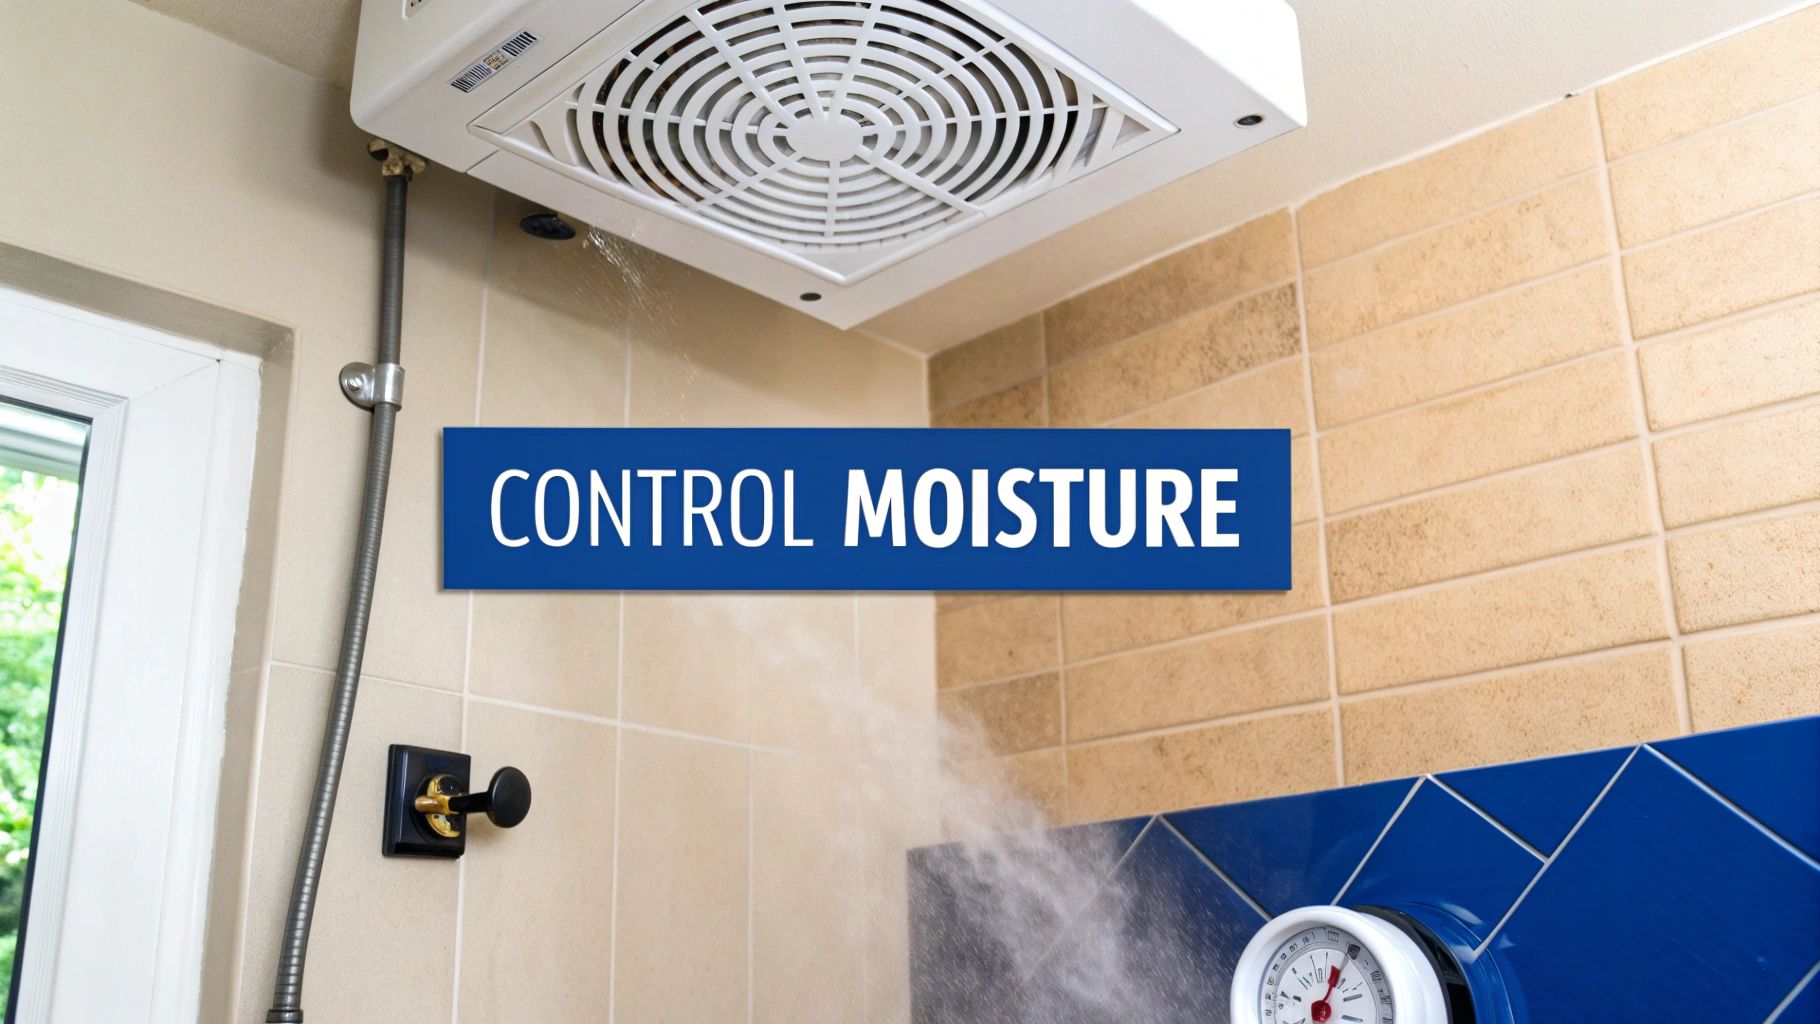
In the vast majority of cases, the root cause of bathroom ceiling mold is inadequate ventilation. A hot shower introduces a significant amount of water vapor into a small, enclosed space. If this humid air cannot be effectively exhausted, it condenses on the coolest available surface—typically the ceiling—providing an ideal breeding ground for mold.
Your bathroom exhaust fan is the primary defense against this. However, many standard builder-grade fans are underpowered and cannot move a sufficient volume of air. It is crucial to operate the fan during every shower and for at least 30 minutes afterward to exhaust moist air before it can condense.
A simple test of your fan's effectiveness: while it is running, hold a single square of toilet paper up to the vent. If the suction is not strong enough to hold the paper in place, the fan is likely inadequate for the size of your bathroom.
Proper operation depends on having the right equipment for the task.
Choosing the Right Exhaust Fan
A fan's capacity is measured in Cubic Feet per Minute (CFM), indicating the volume of air it can move. To be effective, a fan's CFM rating must be appropriate for the bathroom's size. The industry standard is to multiply the bathroom's square footage by 1.1. For an 8×10 foot bathroom (80 sq. ft.), a fan rated for at least 88 CFM is required.
Equally important is where the fan vents. A startling number of exhaust fans are improperly installed to vent directly into the attic. This does not solve the moisture problem; it merely relocates it, creating conditions for extensive mold growth in the attic insulation and roof structure. A correctly installed fan must always be ducted to the exterior of the building.
Identifying Hidden Leaks and Seepage
While poor ventilation is the most common cause, sometimes the moisture source is more covert. Slow, hidden leaks can saturate ceiling drywall from an upper floor, providing a direct and constant water supply for mold.
Regularly inspect for these common issues:
- Plumbing Leaks: Examine any pipes in the attic or floor joists above the bathroom for drips, corrosion, or water stains on surrounding wood.
- Caulking and Grout: Inspect the seals around your tub or shower. Cracked, peeling, or missing caulk allows water to penetrate the wall cavity. The same is true for compromised grout.
- Roof Leaks: After a heavy rain, inspect the attic space directly above the bathroom for any signs of water intrusion.
Early detection of these minor issues can prevent a major mold remediation project. This is a key component of a comprehensive home health strategy, which you can explore further in our guide on understanding mold prevention and mitigating risks.
Managing Condensation and Insulation
In some cases, the problem is not a leak but a temperature differential. If the attic above the bathroom is poorly insulated, the ceiling surface becomes cold in winter. When warm, humid air from a shower makes contact with this cold surface, condensation forms—the same principle that causes a glass of ice water to "sweat."
This persistent condensation provides sufficient moisture to sustain a mold colony. Improving the insulation in the ceiling helps maintain a warmer drywall surface temperature, drastically reducing condensation and removing mold's water source.
To develop a holistic understanding of moisture control, this guide on how to avoid mold in your home and damp buildings offers valuable broader strategies. By taking control of these moisture sources, you are implementing the final and most critical step in how to permanently remove mold from your bathroom ceiling.
Knowing When to Call a Mold Remediation Professional
The impulse to address a mold problem independently is understandable. However, there are clear situations where a DIY approach becomes ineffective and potentially hazardous. It is crucial to recognize the limitations of self-remediation and know when to engage a service with the specialized equipment and certified expertise to manage the risk appropriately.
The visible mold on a ceiling is often merely the surface manifestation of a more extensive fungal network that has penetrated drywall, insulation, and potentially structural elements. Simply cleaning the surface is like pulling a weed without removing the root. Regrowth is almost certain.
The Ten Square Foot Guideline
The professional remediation industry uses a benchmark known as the 10 square foot rule. If the visible mold covers an area larger than a 3-foot by 3-foot square, it should be considered a significant contamination. An area of this size indicates that the problem is too widespread for a homeowner to manage safely and effectively.
Such an extensive infestation signals a severe, ongoing moisture issue that has allowed the mold to become well-established. Disturbing a large colony without professional containment protocols can release millions of spores into the home's HVAC system and living spaces, escalating a localized problem into a full-blown property contamination.
When DIY Solutions Prove Inadequate
Even with smaller areas, if mold reappears after repeated cleanings, it is a definitive sign that the root cause has not been addressed. This indicates either that the cleaning agent did not eliminate the mold's hyphae (its root structure) or, more commonly, that the moisture source remains active.
This cycle is a frequent occurrence. Consumer-grade products fail to resolve the underlying issue an estimated 65% of the time. A certified professional's process is investigative. They utilize diagnostic tools like moisture meters and thermal imaging to locate the hidden water source within walls and ceilings that is sustaining the mold growth. The size of the professional market, as detailed in industry reports from sources like grandviewresearch.com, reflects the complexity of achieving permanent solutions.
Engaging a professional is not an admission of failure. It is a strategic decision to protect your property and, most importantly, the health of your family.
Protecting Vulnerable Individuals
This decision becomes non-negotiable if any household members have compromised immune systems, asthma, severe allergies, or other respiratory conditions. For these individuals, the health risks associated with mold exposure are substantially elevated.
The Centers for Disease Control and Prevention (CDC) has linked household mold exposure to a significant number of asthma-related incidents annually. For a vulnerable person, even a small-scale DIY cleanup can aerosolize enough spores to trigger a serious health reaction. Certified remediation firms operate under strict safety protocols, using equipment like commercial-grade HEPA air scrubbers that capture 99.97% of airborne particulates to maintain safe air quality during the remediation process. This level of safety is unattainable with consumer-grade tools.
Your Top Questions About Bathroom Mold, Answered
Navigating a mold issue on your ceiling can bring up many questions. As professionals, we believe in providing clear, factual answers to help homeowners make informed decisions during a stressful time. Here are the answers to the questions we encounter most frequently.
Can I Just Paint Over the Mold?
No. This is one of the most common and detrimental mistakes a homeowner can make. Painting over mold conceals the visual evidence but does nothing to address the underlying contamination.
In fact, this action can exacerbate the problem by providing the mold with a new food source from the organic materials in the paint. The colony will continue to thrive and degrade the drywall beneath the paint layer. Inevitably, the stain will reappear, and the problem will be more deeply entrenched. The only effective solution is the complete physical removal of the mold and the correction of the moisture source.
Is Black Mold on My Ceiling Dangerous?
Any type of mold within a home has the potential to cause adverse health effects, particularly for individuals with allergies, asthma, or compromised immune systems. The term "black mold" is often used to refer to Stachybotrys chartarum, a species capable of producing mycotoxins.
However, many mold species can appear black, and visual identification is not possible; it requires laboratory analysis. From a remediation standpoint, the specific species is less important than the presence of the mold itself. All visible mold should be treated as a potential health risk and removed promptly and safely by established protocols.
The key takeaway is this: the color of the mold does not determine the risk. The presence of any mold indicates a moisture problem that must be resolved to protect your property and your family's health.
How Long Does It Take for Mold to Grow Back?
If the underlying moisture problem is not corrected, mold can begin to regrow in as little as 24 to 48 hours. This is precisely why a professional's first step is always to identify and eliminate the source of moisture, whether it is a plumbing leak, inadequate ventilation, or chronic condensation.
Scrubbing the visible growth is only a temporary measure. Permanent removal is achieved by altering the environmental conditions to make them inhospitable for mold.
What Does Professional Mold Remediation Cost?
The cost of professional remediation services varies based on several key factors:
- The Scope of Contamination: A small, localized patch is less complex and costly to remediate than an infestation that has spread into the attic or behind walls.
- Affected Materials: Cleaning mold from a non-porous surface is simpler than projects requiring the removal and replacement of contaminated drywall, insulation, or structural wood.
- Complexity and Accessibility: The ease of access to the affected area and the level of containment required will influence the overall cost.
While professional service is an investment, it provides assurance that the remediation was performed correctly, safely, and completely, mitigating future health risks and property damage.
When facing a persistent or extensive mold problem, you need a trusted partner to ensure the safety of your property. The certified professionals at 360 Hazardous Cleanup possess the expertise and commercial-grade equipment to eliminate mold at its source and prevent its return. Contact us for a discreet and thorough assessment.